Okay, so since not everyone knows how to take a good, crisp screenshot, I was thinking that I may as well create this topic so that we can help one another take better screenshots.
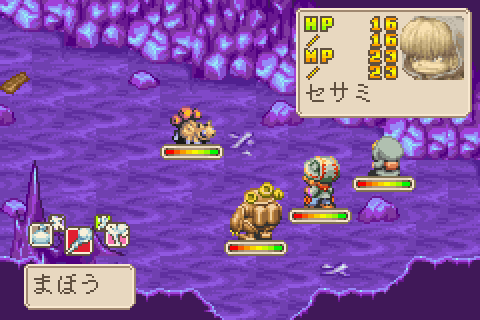
An example of how clean and crystal clear your screenshots can be, using this method. And getting such lovely screenshots is much easier than you might think.
Now, before I go further, I'll say that I realize that not everyone has the same sorts of standards when it comes to images: what looks fine to one person may look deplorable to someone else. What I think we should shoot for are images that are as clean and accurate of representation of the games as we can get (or in the case of official art, the best quality that can be found, within reason).
There are plenty of ways to do this, some yeilding better results than others. For my money, this is a reasonably easy way to do it, with near pixel-perfect. It may LOOK like a lot at first, but once you've started, most of these steps can be skipped to make new screenshots anyway, so I swear it's a ton easier and less complicated than it may look at a glance:
- First of all, we'll assume that you're running magical Starsign or Magical Vacation in an emulator. Personally, I reccomend the free No$GBA 2.6a, which can run either a Gameboy Advance, or a Nintendo DS game (despite what No$GBA's perhaps misleading name may indicate). Once your game is loaded, go to Options and in the Emulation tab, in the GBA Mode, select GBA (poppy bright). Then go to Options/ Save Options. (DO NOTE that the window size for No$GBA cannot be changed or maximized to full screen. I'm sure you can deal with it. If you REALLY need it bigger, I'd advise setting your monitor to a lower resolution when you use it.)
- Next up we'll need an image editor. There are all kinds of programs that you could use for screenshots... but chances are if you're reading this, you don't have software that you're entirely comfortable with yet to do this task (if you do have a program you like, then by all means, just do your thing and skip ahead to the next steps). What I'll recommend is IrfanView, which can be downloaded here. It's a free, very small program that should run on any PC, and it's quite easy to use for this purpose (in fact, I only started using it moments ago, and caught on right away). Run the setup program once it's downloaded, which will start the installation. Follow the onscreen instuctions, then open it once it's installed.
- Start playing your game in No$GBA, and get ready to take your screenshot. (You may have to be quick on the draw to get those frames that you really want, though!). See this video for details on how to do this, with a laptop or with a regular keyboard (note that if you are NOT emulating with No$GBA and this doesn't work, then holding the Alt key while you do so may do the trick). If you're using No$GBA and have that window "active" (i.e., you've just clicked it) then this SHOULD just take a screenshot of the emulator window, meaning you won't have to deal with pesky things like cropping, thank goodness. DO NOTE that at this step, you'll not yet see a picture of the in-game image yet -- the image is merely invisibly sitting on your "clipboard".
- Back to IrfanView. Here, you'll need to paste the screenshot you just took. This can be done with Edit/ Paste, or by pressing Ctrl+v on your keyboard. The screenshot you just took should appear! :D Awesome! (if not, try the previous step again, making sure that your emulator window is the active, clicked window)
- Now, you'll want to save the image. Go to File/ Save As. This will open some new stuff up. First, you will select a File Name (try to make it something that indicated what the screenshot is of). Then in the drop-down menu titled "Save as type", select "PNG - Portable Network Graphics". In that other little window titled "PNG/PNM/ICO save options" set compression level to 0 (that's zero, not the letter O). Once you've done that, at the top of the other window "Save Picture As..." window, in the "Save as" drop-down menu, select the folder where you'd like to save your image, and finally, press the Save button. Huzzah! You've just saved a lovely screenshot!
- Repeat steps 3 through 5, and take as many screenshots as you need to.
- Now, you may be saying "What?! Why are there more steps? I already took my screenshots, you fool!!". Well, yes, but you probably want to resize those screenshots before uploading them to this wiki. You can resize a bunch of them at the same time with IrfanView! Go to File/ "Batch Conversion/Rename". This will open a new window. In that window, select the file(s) that you want to resize and click either "Add" or "Add All", depending on whether you selected one or many files. Then click the "Use current ('look in') directory button. Next, select "PNG - Portable Network Graphics" for the Output Format. Check off the "Use advanced options (for bulk resize...)" box. Then click the Advanced button. We're almost there, I swear.
- A new window will open. Check off the "RESIZE" box. Check off the "Preserve aspect ratio (proportional)" box (if it's not checked off already). Then select "Set new size as percentage of original". In the box marked "Width", type in the number 200. Check off "Overwrite existing files". (OPTIONAL: Once you've done all this, you can click "Save settings" and save it as "Magical Size Batch". This can later be loaded with the "Load settings" button on later batch conversions so that you can skip most of step 8 next time! :D ). Finally, click "OK". and then, now that you're back to your previous window, click on "Start Batch". A new window should open up to show your progress. Depending on how many screenshots you're resizing, this could take a little while to finish, but probabaly not too too long?... Anyway, once it's done its thing, click on "Exit Batch". Your screenshots are now ready for uploading! :O
- Repeat steps 7 and 8 if you want to rezise more images. If you've not changed your settings since last time, there's a good chance they may even be preserved for you, so you may be able to just select your files and then click "Start Batch".
- Post whatever wonderful new screenshots you have taken that will add to the Magical Wiki (you may want to check on whether or not a good screenshot for an entry already exists before you post one yourself).
Again, I'd like to stress that while all that may look daunting, it's honestly not all that bad at all.
Good luck, and happy contributing!
If you have any questions, please feel free to ask, and I'll do my best to answer. :D
It's also possible that I skipped a step or made a mistake in there somewhere, so if your screenshots are NOT turning out right, please let me know!
Ozwalled 14:19, January 12, 2012 (UTC)
ALSO NOTE:
When taking screenshots of enemies for their main Infobox picture, please try to get them unobscured and WITHOUT their aura.
Thanks!
Ozwalled 03:23, January 22, 2012 (UTC)